Picture this: at sunset, your garden path is softly glowing, the patio table is set for dinner, and the kids are running around the lawn under warm, welcoming light. The unsung hero behind this scene is your landscape power supply (low-voltage transformer). It converts your home’s 120 V AC power into safe, low-voltage electricity that keeps every fixture shining.
But when the transformer is chosen incorrectly or installed improperly, you may end up with flickering lights, dim fixtures at the far end of the run, or even a completely dead circuit. Don’t worry — here’s a guide to the most common pitfalls people run into and exactly how to steer clear of them.
1. Mixing AC and DC – Lights Fail Instantly
A classic mistake: some landscape lights are AC 12 V/15 V, while others are DC 12 V/24 V. Connecting them to the wrong power supply can trip breakers, hum loudly, or leave the lights completely dark.
Solution: Always check the nameplate on your fixtures first — is it AC or DC? Keep each type on its own circuit with the proper power supply. If you’re running both AC and DC lights in the same project, separate them into different runs.
2. Underestimating Total Wattage – Overworked Transformer
Many homeowners just add up the total wattage of their lights and buy a transformer that matches it exactly. The problem? No headroom for startup current, summer heat, or future expansion.
Pro Tip: Add 20–30% headroom. For example, if your lights total 120 W, pick a 150–180 W transformer. It will run cooler, last longer, and give you room to add more lights later.
3. Ignoring Voltage Drop – Dim Lights at the Far End
Low-voltage systems are sensitive to voltage drop. The longer the run and the thinner the cable, the lower the voltage at the far end — which means dim or flickering lights.
- For runs longer than 65 ft (20 m), use 14 AWG or 12 AWG cable.
- Use the 14 V or 15 V tap for long runs to compensate for drop.
- Favor a “star” wiring layout rather than one long daisy-chain.
- Use an online voltage drop calculator before installation to avoid rework.
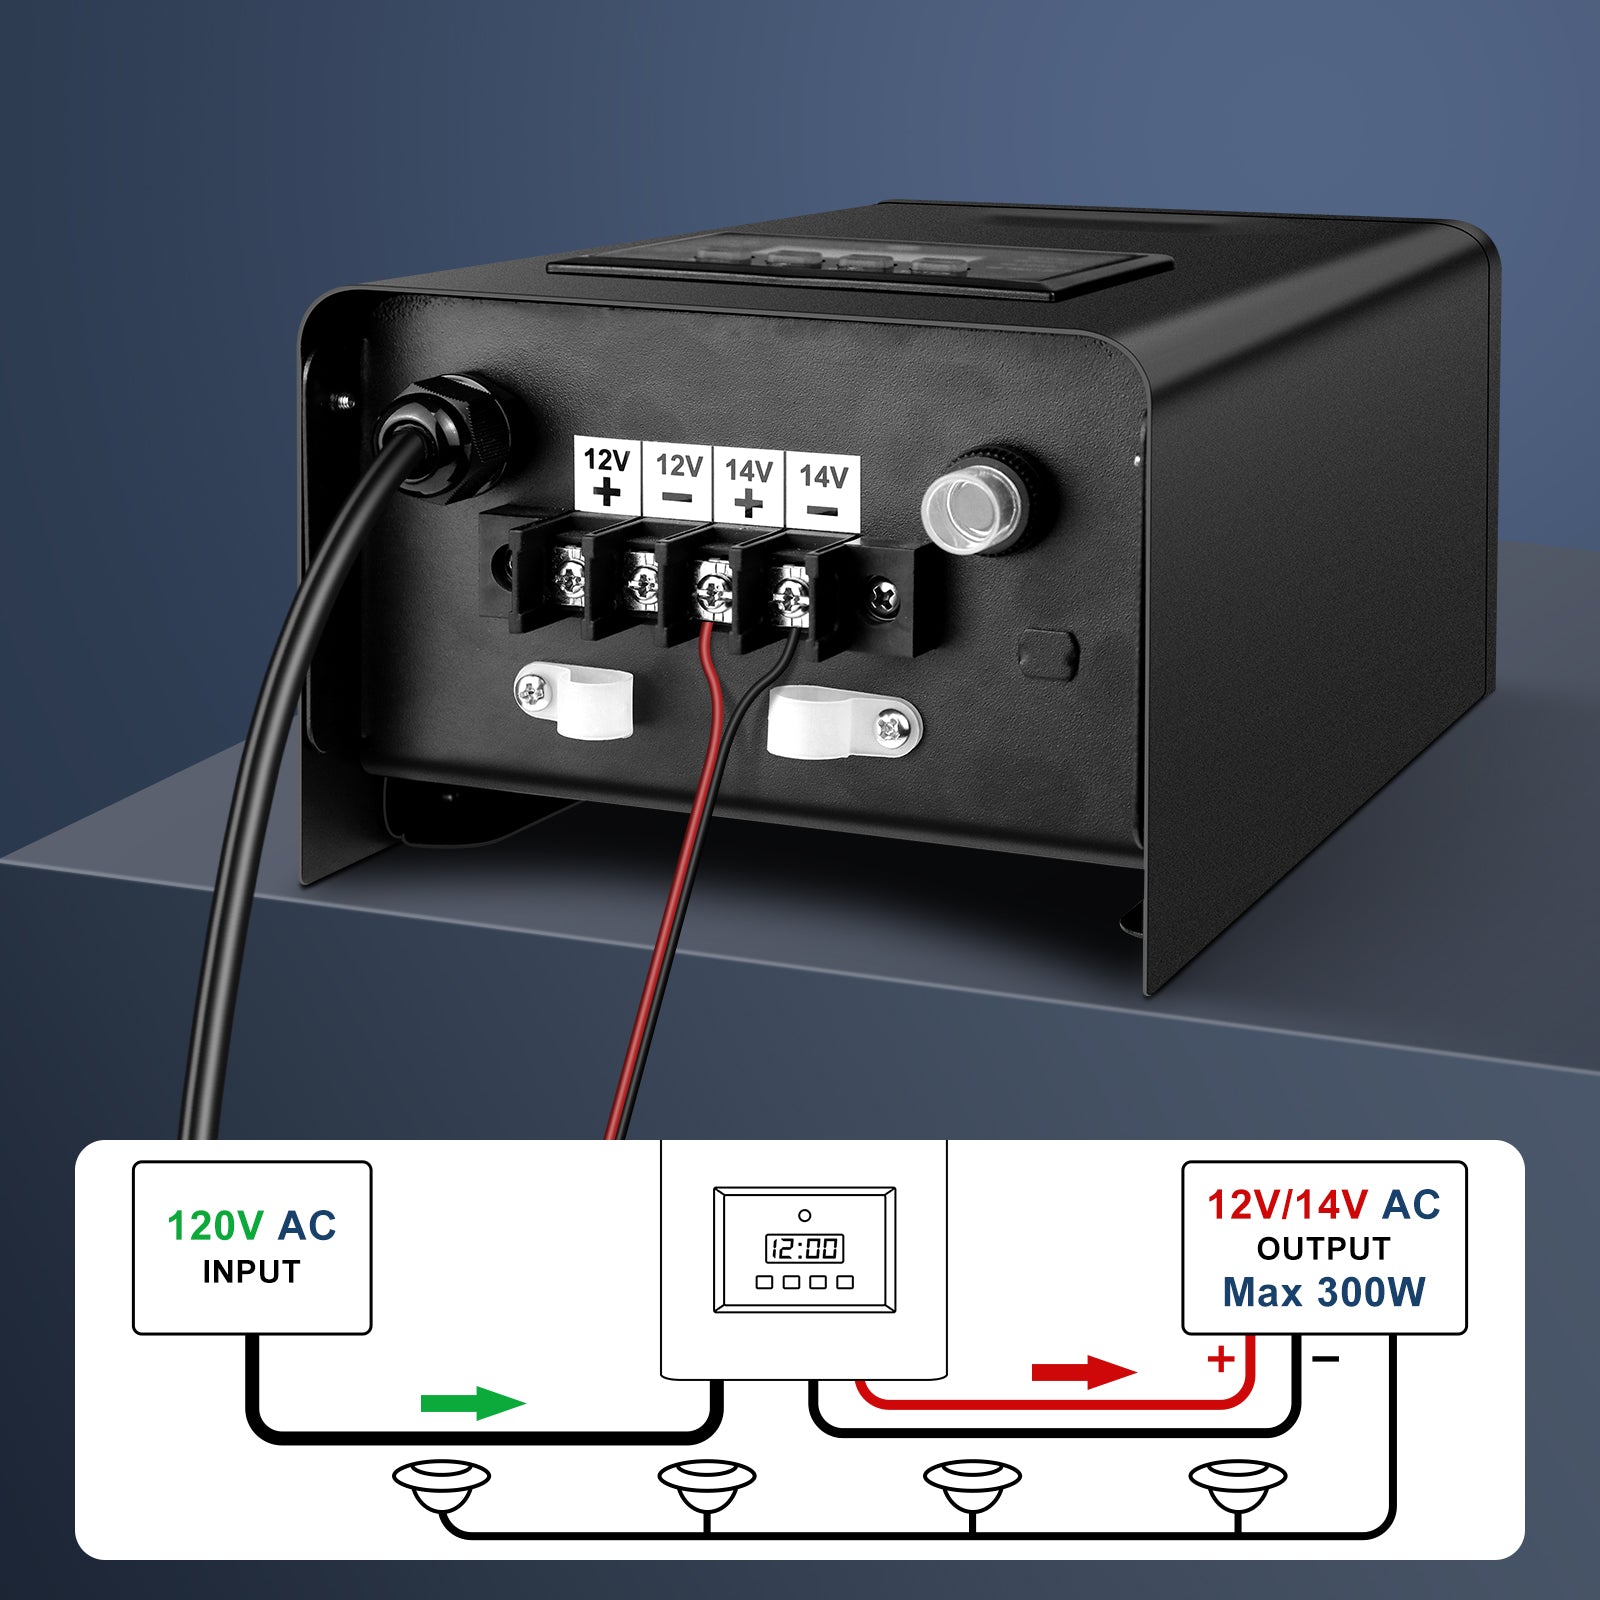
4. Not Using Multi-Tap Outputs – Uneven Brightness
Many transformers come with multiple taps (12 V, 14 V, 15 V), but most people only connect to 12 V. This leads to uneven brightness across the yard.
Solution: Connect longer runs to the higher-voltage taps and short runs to 12 V. The entire landscape will look evenly lit — no more bright near lights and dim far ones.
5. Controlling the Transformer with a Wall Dimmer or Smart Plug
Transformers aren’t designed to be dimmed with a wall dimmer — this can cause buzzing, flicker, and shortened lifespan.
Solution: Use the transformer’s built-in LCD timer, photocell, or a compatible smart control module for scheduling.
6. Poor Waterproofing – Post-Rain Blackouts
Water is the enemy of outdoor electrical connections. A little moisture can lead to corrosion, short circuits, or complete failure.
- Use gel-filled waterproof connectors and junction boxes.
- Choose direct-burial rated cable for underground runs and cover it properly.
- Add a drip loop to avoid water running down into the connection.
7. Incorrect Photocell or Timer Setup
If the photocell is blocked, facing the wrong direction, or too close to a light source, your system may stay on all day or never turn on at night.
Solution: Mount the sensor in an open spot, away from artificial light. Once you set the timer, observe it for a night and fine-tune if needed.
8. Mounting the Transformer in the Wrong Spot
- Mount it at least 12 in (30 cm) above ground on a solid wall or post.
- Allow ventilation space around it for heat dissipation.
- Keep it away from sprinklers or shield it with a rain cover.
9.Wiring Fixtures in Series – Troubleshooting Nightmare
Series wiring might save cable, but if one fixture fails, every light downstream goes dark.
Best Practice: Wire all fixtures in parallel at the transformer terminals. Each light gets full voltage, and troubleshooting is much easier.
10. Skipping GFCI and Grounding
Series wiring might save cable, but if one fixture fails, every light downstream goes dark.
Best Practice: Wire all fixtures in parallel at the transformer terminals. Each light gets full voltage, and troubleshooting is much easier.
11. Skipping Circuit Labels and Testing
Solution: Use a GFCI-protected outlet and ensure the transformer’s metal housing is properly grounded to avoid electrical hazards.
12. Forgetting Future Expansion
Choosing a transformer that just barely covers today’s load means you’ll need to replace it when you add new fixtures.
Solution: Buy a transformer with some extra capacity from the start — it’s cheaper and easier than replacing the entire power source later.
Summary
Installing a landscape power supply isn’t complicated, but the details make all the difference. Choose the right transformer, size it with headroom, wire in parallel, waterproof your connections, and your lights will stay bright and reliable for years to come — giving you a safe, inviting outdoor space night after night.
If you’re still shopping for the right power supply, take a look at these recommended models:
150W / 200W / 300W / 400W / 500W / 600W Low Voltage Landscape Transformers, all with multi-tap outputs and built-in timer/photocell functions — perfect for projects from small gardens to large yards.