From simply “powering on a module” to having a fully functional LED display, the process requires much more than just LED panels. A reliable system is the result of power supplies, control cards, cabling, enclosures, and software working together. Understanding the role of each accessory not only ensures stability but also makes installation and maintenance much easier.
Below is a step-by-step breakdown of the key components you’ll need when putting together a complete LED screen.
LED Module Selection
The LED module is the core display unit, consisting of LEDs, driver ICs, PCB, power, and data interfaces.
-
Pixel Pitch
-
Common options: P2.5 / P3.91 / P4.81 / P5 / P10
-
Principle: the closer the viewing distance, the smaller the pixel pitch. Outdoor large screens often use P5 or above.
-
Module Size & Interface
-
Standard sizes: 320×160 mm, 240×120 mm
-
Data interface: HUB75, standard input DC 5 V
-
Assembly: module dimensions must match the cabinet, e.g., a 640×480 mm cabinet fits four 320×160 mm modules.
-
Brightness & Protection
-
Indoor: 800–1200 nits is usually sufficient
-
Outdoor: ≥5000 nits and IP65 rating for water and dust protection
-
Maintenance Method
-
Front access: modules can be removed from the front with magnetic tools; ideal for wall-mounted or embedded installations
-
Rear access: easier disassembly, common in rental cabinets with backstage access
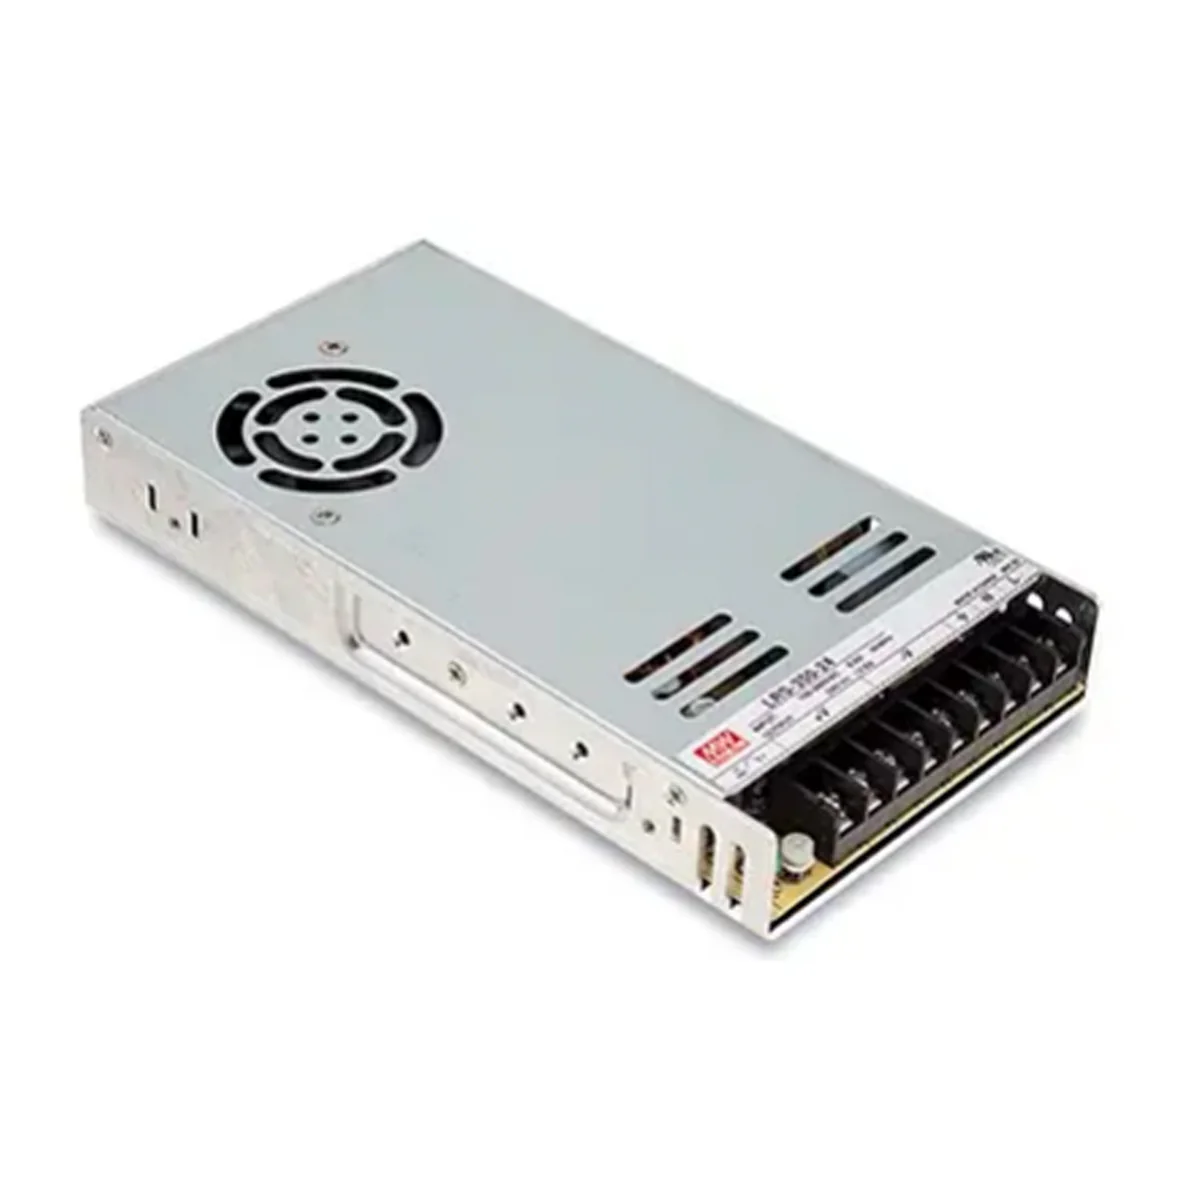
Power Supplies & Capacity Planning
LED modules operate on stable 5 V DC power, which requires reliable power supplies.
-
Power Calculation
-
Max power per module × number of modules = total load
-
Add 20–30% headroom for stability
-
Example: one 320×160 mm indoor module consumes ~30 W. 100 modules = 3,000 W → recommended supply ≥3,600 W
-
Typical Power Cables
-
5 V branch cables:
-
1-to-2 split, 18AWG + 2.5 mm²
-
Lengths: 350 mm / 750 mm / 850 mm
-
UL standard (gray/brown) or red-black national standard
-
DC power cords:
-
3×2.5 mm² or 3×14AWG
-
Lengths: 600 / 800 / 1200 mm
-
With O-ring terminals for secure connections to power supplies or receiving cards
-
Power Supply Models (Examples)
-
LRS-350-5: versatile indoor option
-
UHP-350-5: slim, efficient, ideal for thin cabinets
-
RSP-320-5: designed for damp or semi-outdoor environments
Receiving Cards & Signal Loading
The receiving card is the “nerve ending” of the control system, distributing incoming data to each module.
-
Key Specs
-
Maximum load capacity (e.g., 512×256 pixels)
-
Output type: HUB75 / HUB75E
-
Refresh rate: ≥1920 Hz; premium models up to 3840 Hz for smoother video
-
Monitoring functions: some models track voltage, temperature, and status
-
Deployment
-
Common setup: one receiving card per cabinet → cleaner wiring and easier troubleshooting
-
HUB distribution boards are often used for flexible module connections, compatible with NovaStar, ColorLight, Huidu systems
Sending Devices
The sending device is the entry point for content. Options vary based on screen size and complexity:
-
Sending Cards: simple PC-driven setups for small, fixed-resolution displays
-
Sending Boxes: external devices with multiple input ports, easier wiring, common in rental setups
-
Video Processors: advanced scaling, multi-window, and signal switching, widely used for events, exhibitions, and stage setups
Cabling & Connections
Stable cabling is critical for both power and data integrity.
-
Flat Ribbon Cables (module ↔ receiving card)
-
HUB75 standard
-
16-pin: 400 / 600 / 800 / 1000 / 1200 mm
-
20-pin: 600 / 900 mm
-
Network Cables (sending ↔ receiving cards)
-
Cat5e molded cables
-
Standard lengths: 1 m / 5 m / 10 m
-
Molded ends ensure reliable, oxidation-resistant connections
-
Power Distribution
-
Keep cables short to minimize voltage drop and heating
-
For outdoor setups: add grounding, waterproofing, and cable protection
Cabinets & Installation
-
Cabinet Types
-
Die-cast aluminum: lightweight, precise, seamless; ideal for rental
-
Sheet metal: cost-effective, commonly used in fixed installations
-
Installation Methods
-
Wall-mounted / embedded: save space, often used in meeting rooms or retail signage
-
Hanging / stacking: suitable for rental stages, concerts, exhibitions
-
Structural Details
-
Positioning pins, quick locks, and cable routing significantly improve assembly efficiency and visual consistency
Control PC & Software
-
Role: media playback, screen control, parameter setup
-
Recommended Hardware: stable PSU, dedicated GPU, and SSD for smooth playback
-
Modes:
-
Synchronous: real-time display of PC content
-
Asynchronous: offline playback with scheduling, common for advertising displays

Application Examples
|
Model |
Typical Use Case |
Why It Fits |
Notes & Pairing Tips |
|
Indoor / semi-outdoor |
Reliable 5 V PSU, versatile |
Allow 20–30% headroom; works with 320×160 mm HUB75 modules |
|
|
Slim cabinets |
Thin, efficient, low noise |
Ideal for high-brightness projects; ensure ventilation |
|
|
4.5 V module setups |
Stable 4.5 V output |
Use only when modules require 4.5 V; confirm specs first |
|
|
Humid / heavy load |
Moisture-resistant, steady |
Semi-outdoor installs: pair with sealed box, desiccant, grounding |
|
|
Budget-friendly builds |
Certified, supports common 5 V loads |
Size according to total power; compatible with mainstream systems |
This way, we can see that a complete LED display requires not only modules, but also power supplies, control systems, cables, cabinets, and software. With the right accessories and careful planning, you’ll build a screen that’s stable, efficient, and easy to maintain.